can’t wait to get out there with some of these items?
2021 has been quite the year; I hiked the John Muir Trail, something I’ve wanted to do for over 10 years and was fortunate enough to make it work with my job, no fires, no forest closures. I noticed in the past couple years that many people have turned to the outdoors for fun and enjoyment, activity, something to do and/or even a little therapy. I do want to reiterate that there is the Leave No Trace practice that us outdoor folk adhere to. I wish that everyone practices this. We are the fortunate ones to live on this earth and fortunate enough to enjoy it. This in turn means we should take care of it like we would take care of our own children!
Anyway, enough ranting on this subject and let’s get to what I wanted to share with my readers. I spent a little time picking out my favorites that would be great gifts for anyone who is into the outdoors. I hope you take a look and find something that you could buy for your loved one this year.
*Note: there are affiliate links below, if a purchase is made from my recommendations this will in turn help pay for the expenses that keep this blog up and running.

I don’t actually own this exact one, but my buddy who we go backpacking with just upgraded his to this one. I ended up just buying a coffee press that goes with the current Jetboil I have. Either way, this is a good one for camping and hiking/backpacking.
Where to buy: Amazon
[maxbutton id=”8″ url=”https://amzn.to/3qklQQf” ]
REI Co-op Flexlite Air Chair
 I bought this mainly because it’s hard not to have a chair to sit in when backpacking especially for multiple days. I used to use my Thermarest Z-Lite pad, which I would also use for sleeping. This was probably one of my favorite; I even took it with me when I went to a lake just to fish.
Where to buy: REI
[maxbutton id=”7″ url=”https://www.rei.com/product/148036/rei-co-op-flexlite-air-chair” ]
 One of our camping trips our friend brought this for us as a surprise. I have never had so much comfort in the kitchen on a camping trip then when using this item.
Where to buy: Bass Pro Shops
[maxbutton id=”5″ url=”https://www.basspro.com/shop/en/cabelas-deluxe-camp-kitchen” ]
On my wish list. It’s a propane camp stove and oven; I’ve always wanted to be able to have something like this for comfort camping.

Where to buy: Amazon
[maxbutton id=”4″ url=”https://amzn.to/3xIyU5T” ]
We’ve had this for many years now, different versions of it and this by far has been a blessing. The best because we can check in with family and they can follow us. There were two hikes where we were able to have family check with the Rangers on what to do. I recommend this for safety for anyone who goes out into the backcountry.

Where to buy: Amazon
[maxbutton id=”3″ url=”https://amzn.to/3EfDviD” ]
Cooler that keeps everything cooler for much longer than other simple coolers.

Where to buy: Amazon
[maxbutton id=”8″ url=”https://amzn.to/3G86tBg” ]
Stanley Stainless Steel Shot Glass and Flask Set

used it and think it’s perfect to put away in the camping box or even take on our backpacking trips (especially in the cold). I’m sure you know someone who will love this.
Where to buy: Amazon
[maxbutton id=”7″ url=”https://amzn.to/3Ed8L1F” ]
Recommend this one for anyone honestly. It’s perfect to use at home too; it stuffs into a small bag, so easy to pack and take on trips with you and it’s quite warm.

Where to buy: Amazon
[maxbutton id=”5″ url=”https://amzn.to/3Ed8L1F” ]
Osprey Transporter 65 Travel Duffel Bag

Perfect bag for any type of travel including camping or even flying for vacation. I think what I like best about it is that there are various ways you can carry the bag itself.
Where to buy: Amazon
[maxbutton id=”4″ url=”https://amzn.to/31pO2JC” ]

Where to buy: Amazon
[maxbutton id=”3″ url=”https://amzn.to/3I9AEKk” ]

My sister and I have a side business we are working on. We have neck gaiters available including the one in the photo on the left, which is of a graphic we did of Hume Lake.
Where to buy: Lakeside view – all-over print neck gaiter & Yosemite down below – all-over print neck gaiter
[maxbutton id=”9″ url=”https://twintedinc.com/shop/yosemite-down-below/yosemite-down-below-all-over-print-neck-gaiter/” ]
LuminAID PackLite 2-in-1 Phone Charger Solar Lantern
I own just a solar charger blowable one, but this would be a good addition to my gear. Having a charger for the lantern as well. Check it out.

Where to buy: Amazon
[maxbutton id=”8″ url=”https://amzn.to/3I9QvIW” ]
A bowl that’s easily packable in your kitchen box for camping or if you want to take it on a backpacking trip.

Where to buy: Amazon
[maxbutton id=”7″ url=”https://amzn.to/3xJVLhv” ]

Where to buy: Amazon
[maxbutton id=”5″ url=”https://amzn.to/3dp6iFL” ]
Sea to Summit Aeros Lightweight Pillow
This pillow another item that is perfect for any road tripper whether it may be going camping, backpacking or just road tripping. Easy to pack away and very lightweight.

Where to buy: Amazon
[maxbutton id=”4″ url=”https://amzn.to/3oaI1sT” ]

Where to buy: Amazon
[maxbutton id=”3″ url=”https://amzn.to/3rsiBJA” ]
Coleman RoadTrip Portable Stand-Up Propane Grill
If you have a camper friend that loves to grill at home, this would be a perfect gift for them as they can use it wherever they go.

Where to buy: Amazon
[maxbutton id=”9″ url=”https://amzn.to/3xGRnQu” ]
Power Practical Luminoodle Portable LED Light Rope
String these lights anywhere you want on any trip. I’ve even took them backpacking and used a portable charger that I use to charge my phone with. I like how it’s not too bright.

Where to buy: Amazon
[maxbutton id=”8″ url=”https://amzn.to/3xI4u3K” ]
That small object you can take on your backpacking trips or camping trips. Apparently it gives an 8 and half minute shower, which make sense because between 2 of us we were able to quickly get in our “shower” outdoors. Might not be quite the winter item, but definitely good for sring/summer/fall trips.

Where to buy: Amazon
[maxbutton id=”7″ url=”https://amzn.to/3IaURiX” ]
Big Agnes Ultra Light Backpacking Tent
We actually own the 3 person one, mostly because we wanted something for our backpacking trips where we could put all our items in the tent with us instead of leaving stuff outside. You have to be very careful with the material, but man does it compress into a tiny spot in your backpack. Very easy to put up as well, so it wouldn’t matter if you had to put it up in the dark.

Where to buy: Amazon
[maxbutton id=”5″ url=”https://amzn.to/3obAOcc” ]
This item is good for the adventurer, but also good for someone who needs a coffee mug. It keeps things hot or keeps things cold.

Where to buy: Amazon
[maxbutton id=”4″ url=”https://amzn.to/3I8tiqz” ]

Where to buy: Amazon
[maxbutton id=”3″ url=”https://amzn.to/2ZLHmF6” ]
This has been one of the most used cups I’ve had during my adventures. It is so lightweight I’m ok with bringing the lid for the mug to it to keep my coffee warm for longer. It is made out of titanium and packs very easily not taking up that much room.

Where to buy: Amazon
[maxbutton id=”9″ url=”https://amzn.to/31mp8dO” ]
My sister bought me this for my birthday one year and we have used it to make multiple items: quesadillas (still need to write about this), Tacos at 10,000 feet and grilled cheese sandwiches all during our backpacking trips. I would recommend buying some GSI Outdoors Pivot Tongs to go with it, the cooking is endless with it out there.

Where to buy: Amazon
[maxbutton id=”8″ url=”https://amzn.to/3pjRxJO” ]
Alps Mountaineering Weekender Seat

Where to buy: Amazon
[maxbutton id=”7″ url=”https://amzn.to/3d7bmOP” ]
A fun bag of little items
Last but not least, my other idea is grab a few little items and put them in a bag and hand it to them for their present. Check out some of my recommended items.

 Chicken Spring Lake
 Cottonwood Lakes


 Big Pine Lakes – Second Lake
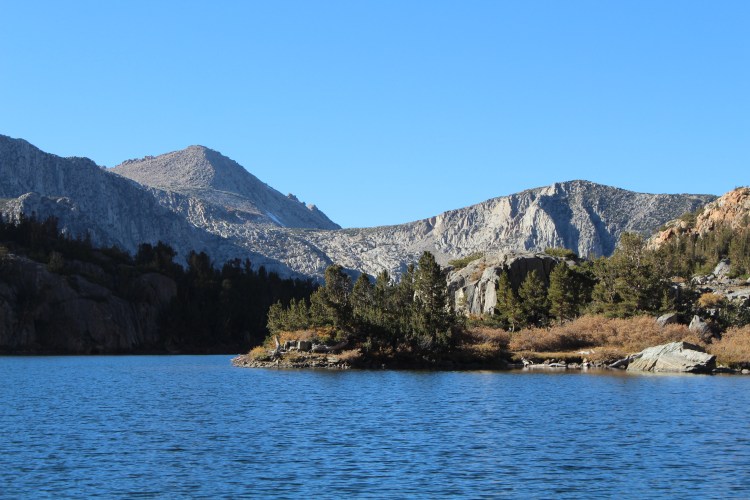
 Long Lake